
Adding videos to Spiti
By default, all videos you add/upload/import are in your personal library and are visible only to you unless you add them to a playlist. You can also add videos directly to a playlist — in this case, the video will have the visibility of the playlist by default.
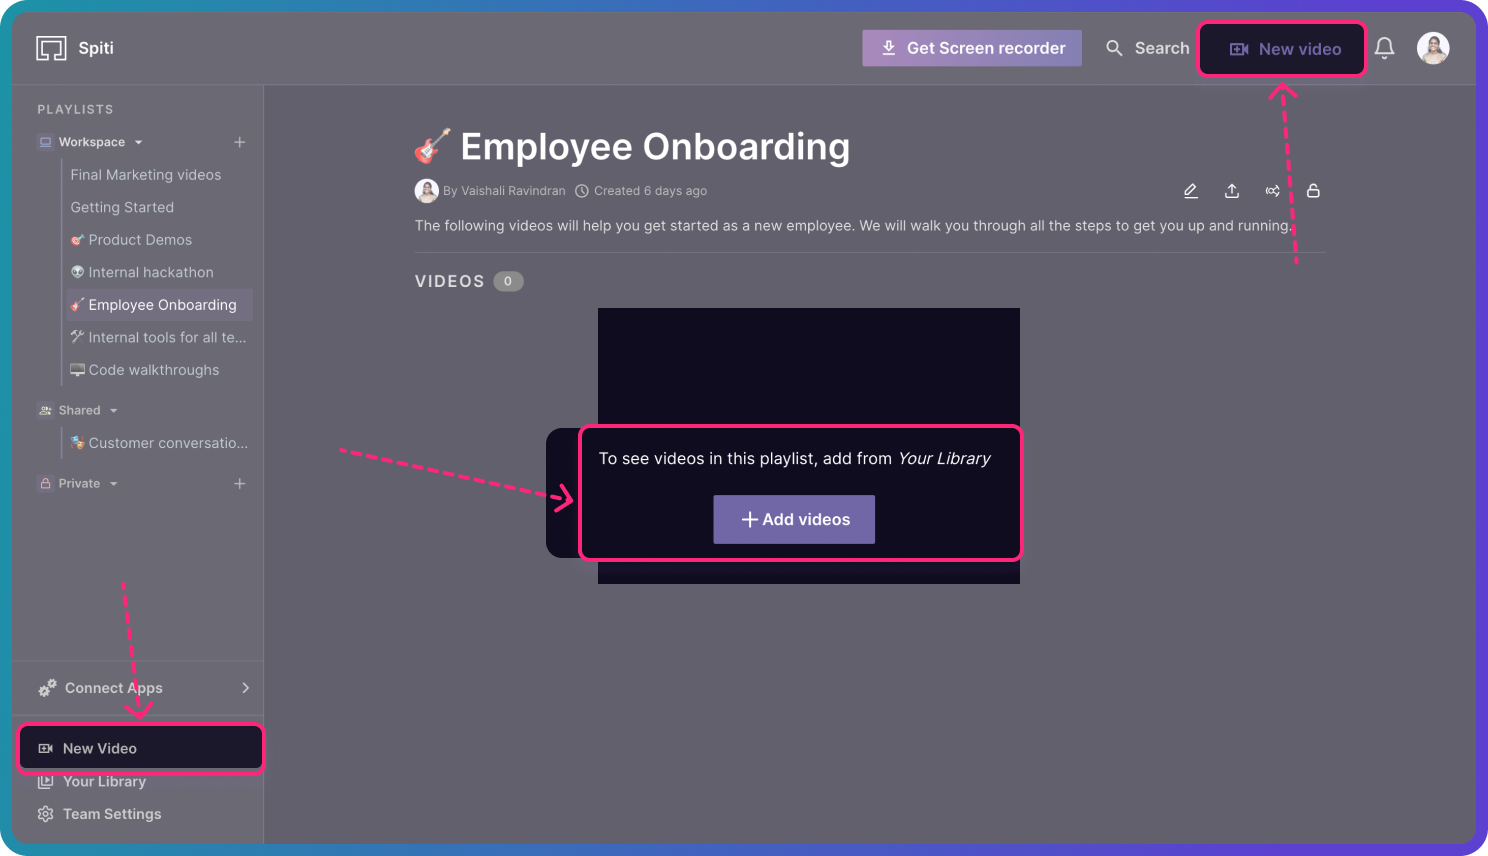
You can add videos to your workspace from 3 different places (as shown below). Currently, Spiti supports adding/importing videos from four sources.
- Direct Upload
- Import from Zoom
- Import from Google Drive
- Recording on Spiti — screen + camera + mic (only for MacOS)
Direct Upload
Click Direct Upload from any of the above three options and choose one or more videos from the file picker.
You will see the upload progress at the bottom right in the tracker and Your Library. Adding a new video to your workspace happens in two stages — uploading and processing; meanwhile you can add a Title and Description to a video(s).
Import from Zoom
With one-click-import capability, you can import meeting recordings from 30 days ago to your Spiti workspace. But first, connect your Zoom account to Spiti. This is a one-time activity. Learn how here.
Once connected, click Add videos —> Import from Zoom —> click Import from the modal. You can also Import more than one recording in one go.
You will see the upload progress at the bottom right in the tracker and Your Library. Adding a new video to your workspace takes place in two stages — uploading and processing. You can add a Title and Description to a video while this is in progress.
Import from Google Drive
Import videos from any folder from your Google Drive account. But first, connect your Google Drive account to Spiti. Learn how here.
Once connected, click Add videos —> Import from Google Drive —> Select videos from the file picker. You can import more than one recording in one go.
You will see the upload progress at the bottom right in the tracker and Your Library. Adding a new video to your workspace takes place in two stages — uploading and processing. You can add a Title and Description to a video while this is in progress.
Record a video on Spiti (only for MacOS)
Spiti screen recorder lets you quickly record a video, while sharing your screen, and share it with anyone. Currently, Spiti Screen Recorder is available only for MacOS. A recorder for Windows is in the making. Get in touch with us for early access.
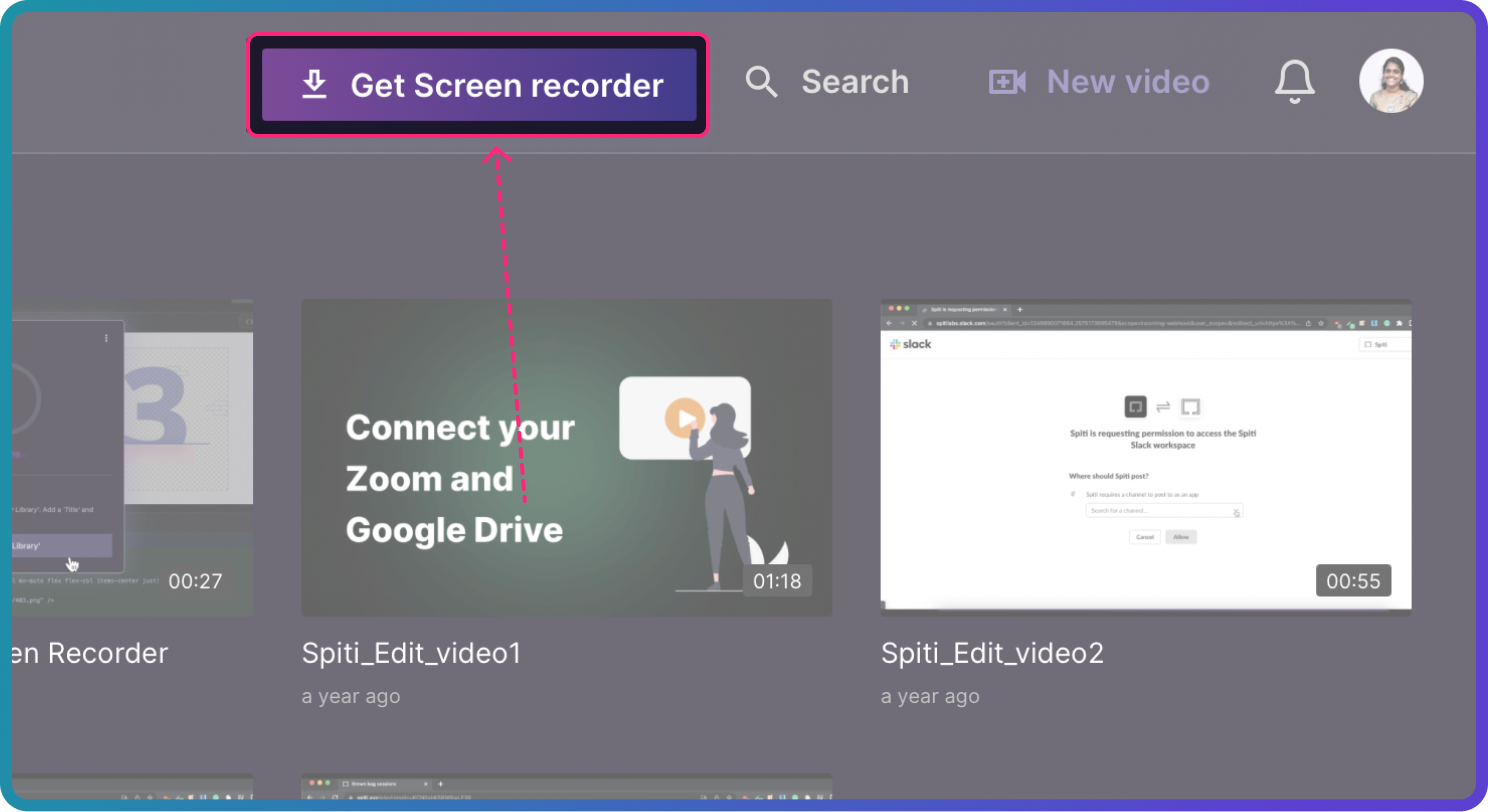
Download the screen recorder from the website or from your Spiti workspace.
More on how to record a video on Spiti here. After you’re done recording, you can see it in Your Library, where you add a Title and Description.
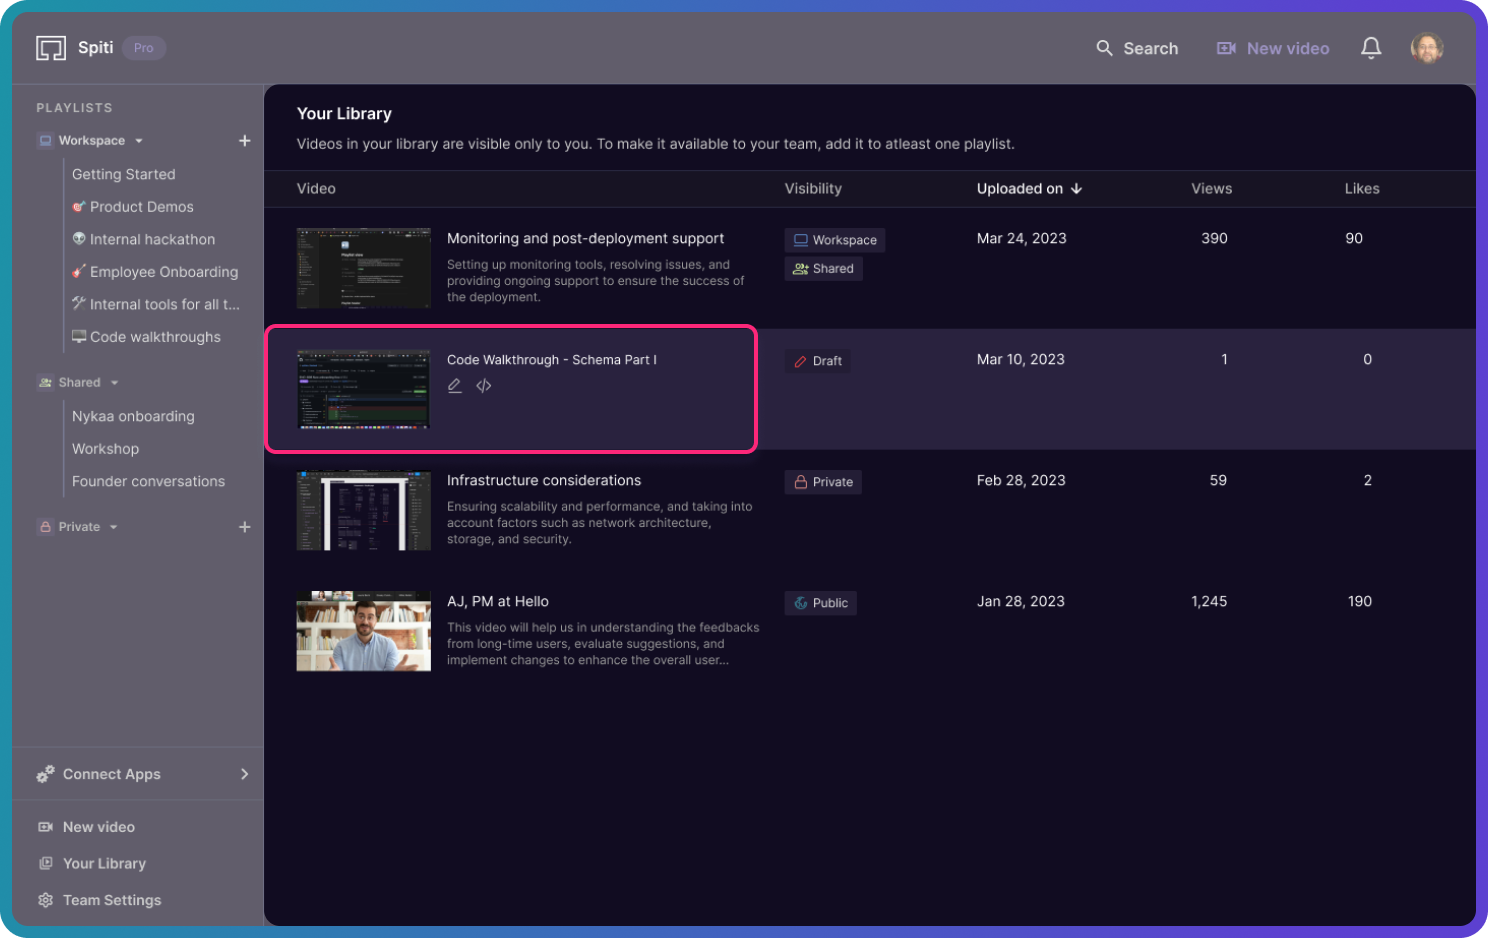
Video Library
The Video Library is where all your video uploads/ imports are listed. All the videos you upload to your workspace are only visible only to you. If you want to share them with your team, you can create a playlist and add relevant videos to the playlist. Note that you can add one video to more than one playlist.
In short, Your Library is exclusive to an individual user, while playlists are for your team.
Understand Your Library
Each video has four parts:
- Video title and description:
- Hover over the description to take quick actions like edit and ‘copy embed link’.
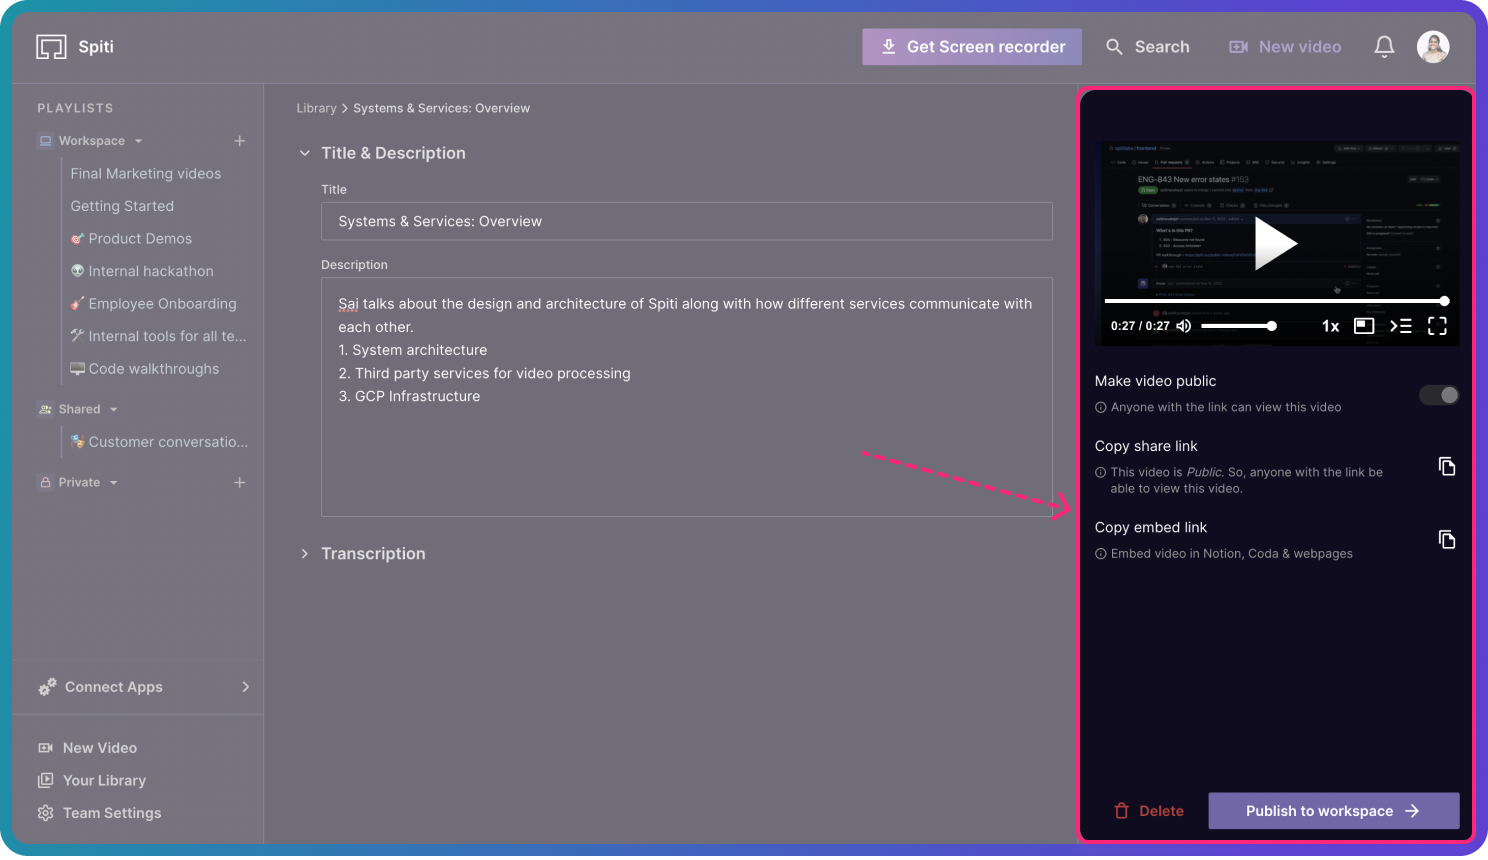
- The edit button opens the edit view, where you can change the Title, Description, and Transcripts. You can take more actions here — change the visibility, copy the embed link, copy the public URL, and delete the video.
-
Visibility: The current visibility of the video. A video can have multiple labels, depending on where it has been shared.
 visible to everyone in your workspace
 can fall under any of the ‘shared’ group categories. Read more about groups here.
 This video has an unlisted share link enabled and could be shared with someone outside your organization.
 This video is visible only to you and has been added to a Playlist under the Private group on the left playlist panel.
 This video is not yet ‘Published to the workspace’ or added to a playlist. It could have pending modifications.
-
Uploaded on: This section can be sorted in ascending or descending order.
-
Number of views
-
Number of likes