
Spiti Screen Recorder
Spiti's native screen recorder helps you create effective and informative videos easily. Currently available only for MacOS, you can easily upload, organize, and share videos with team members and collaborators.
This support document is designed to help you get started with Spiti and provide tips and best practices for using Spiti to document, organize, and collaborate on team videos.
Getting Started with Spiti Screen Recorder
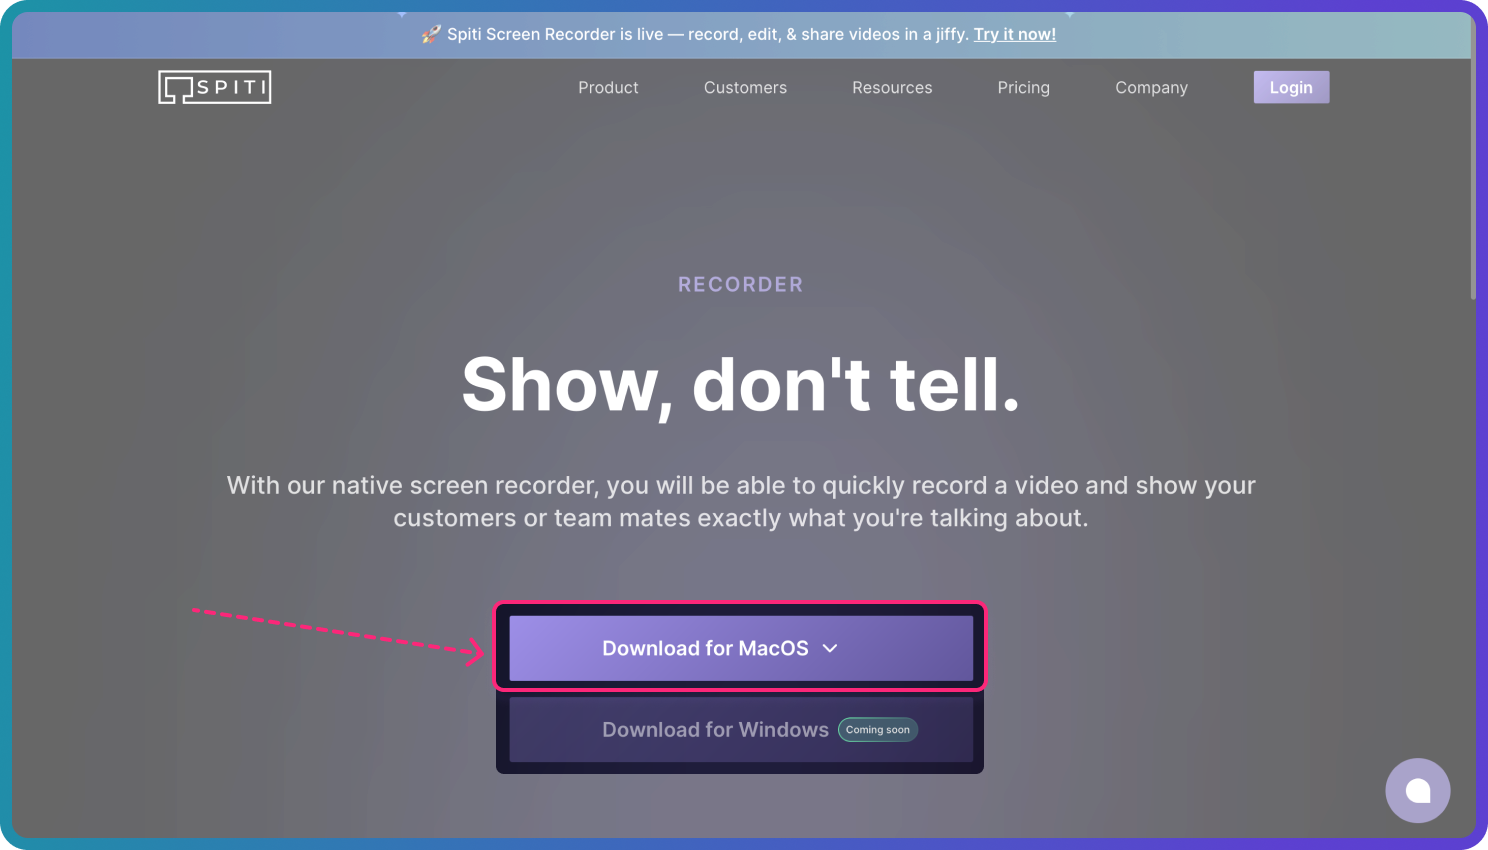
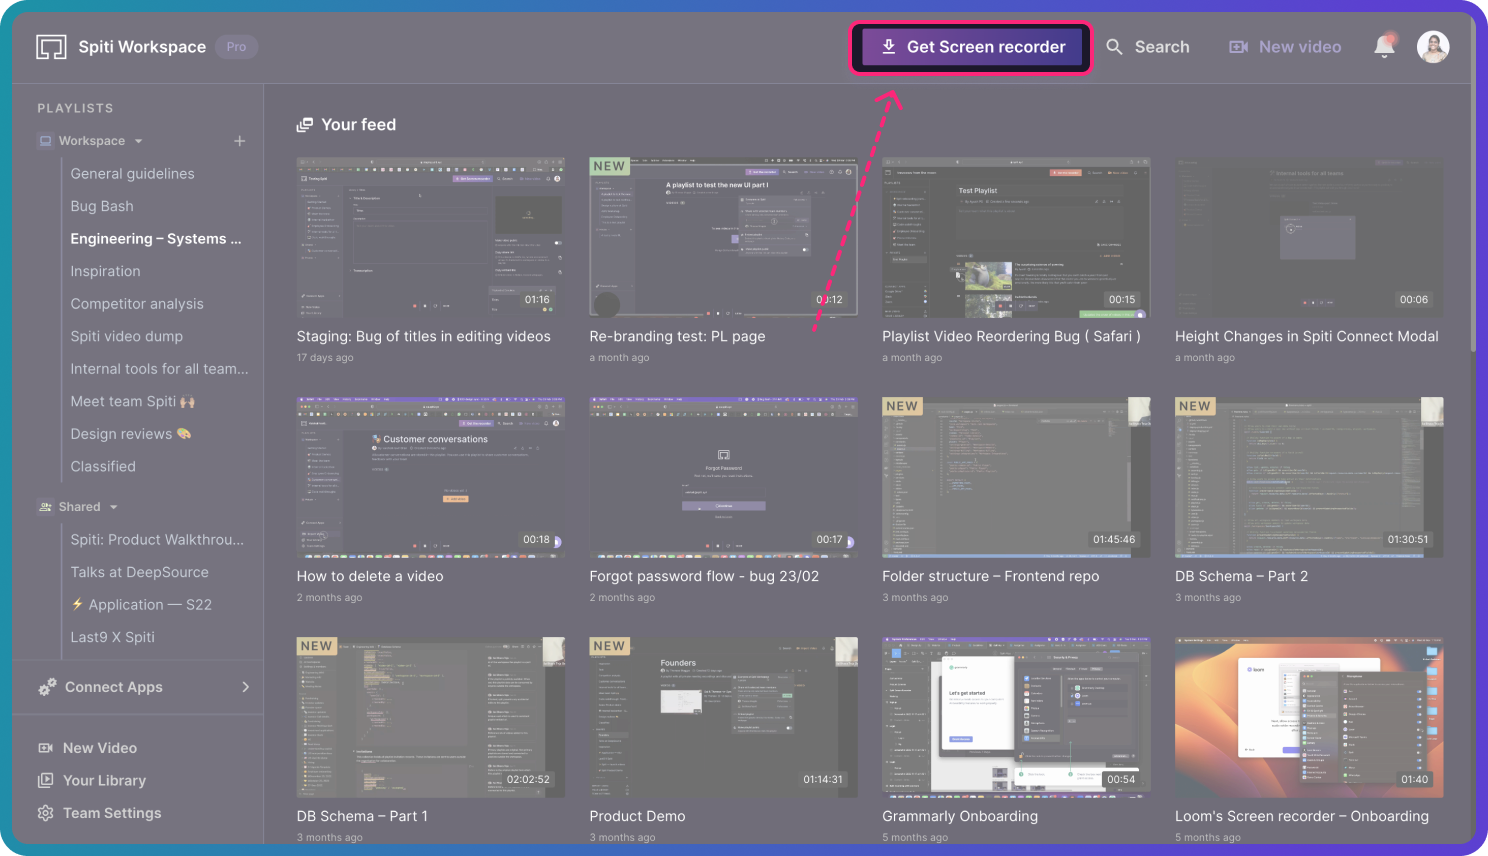
To start with Spiti, download the screen recorder from the website, or if you’re already logged in to your Spiti account, download it from the top nav bar.
-
Install the downloaded .dmg file
-
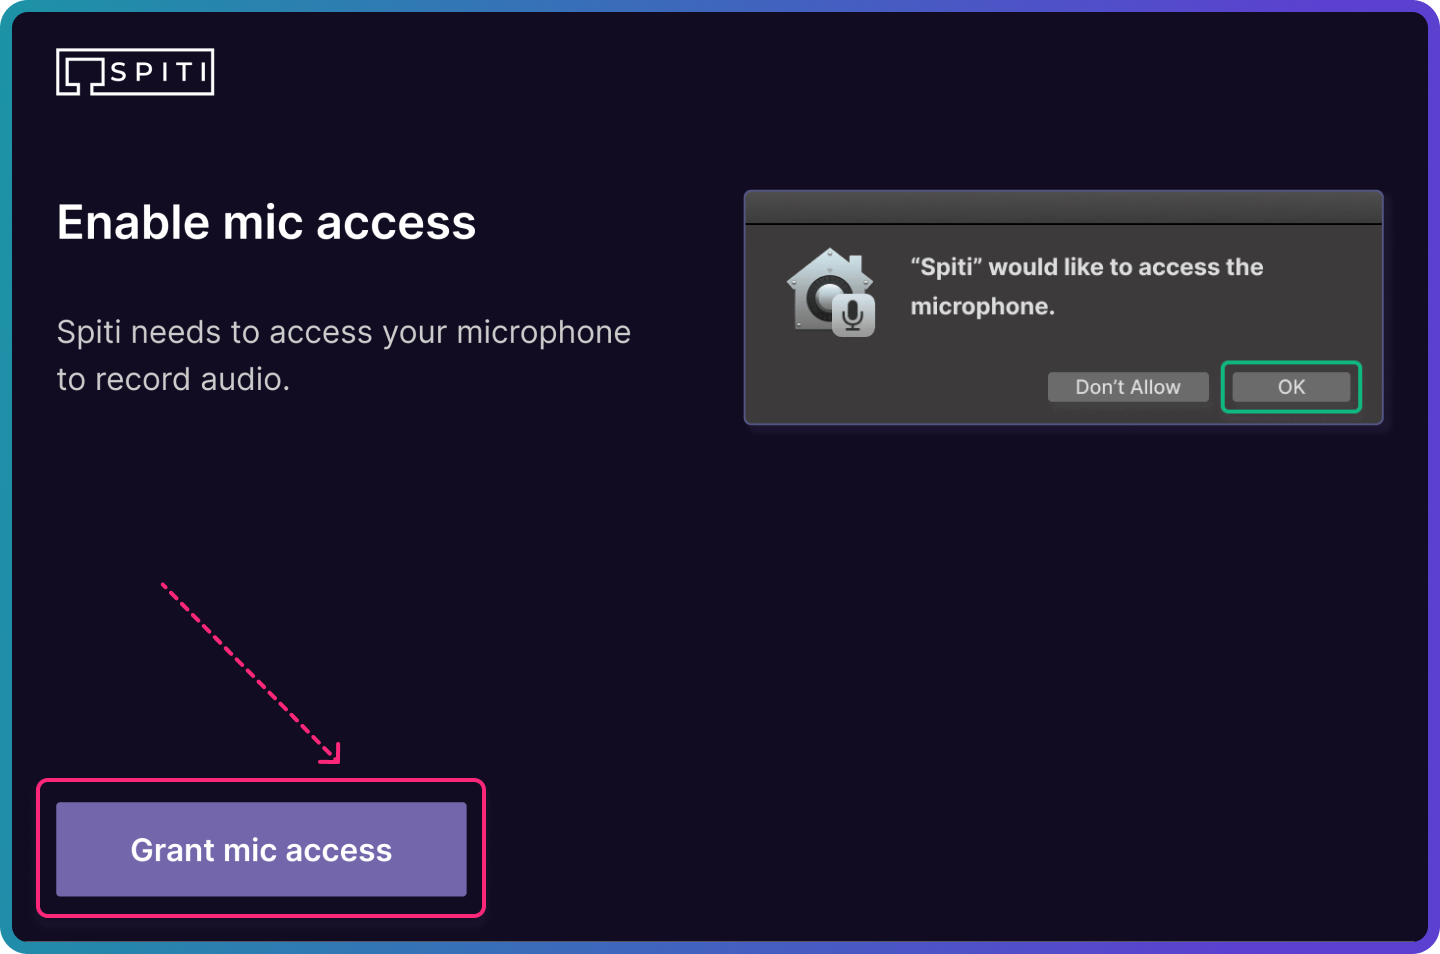
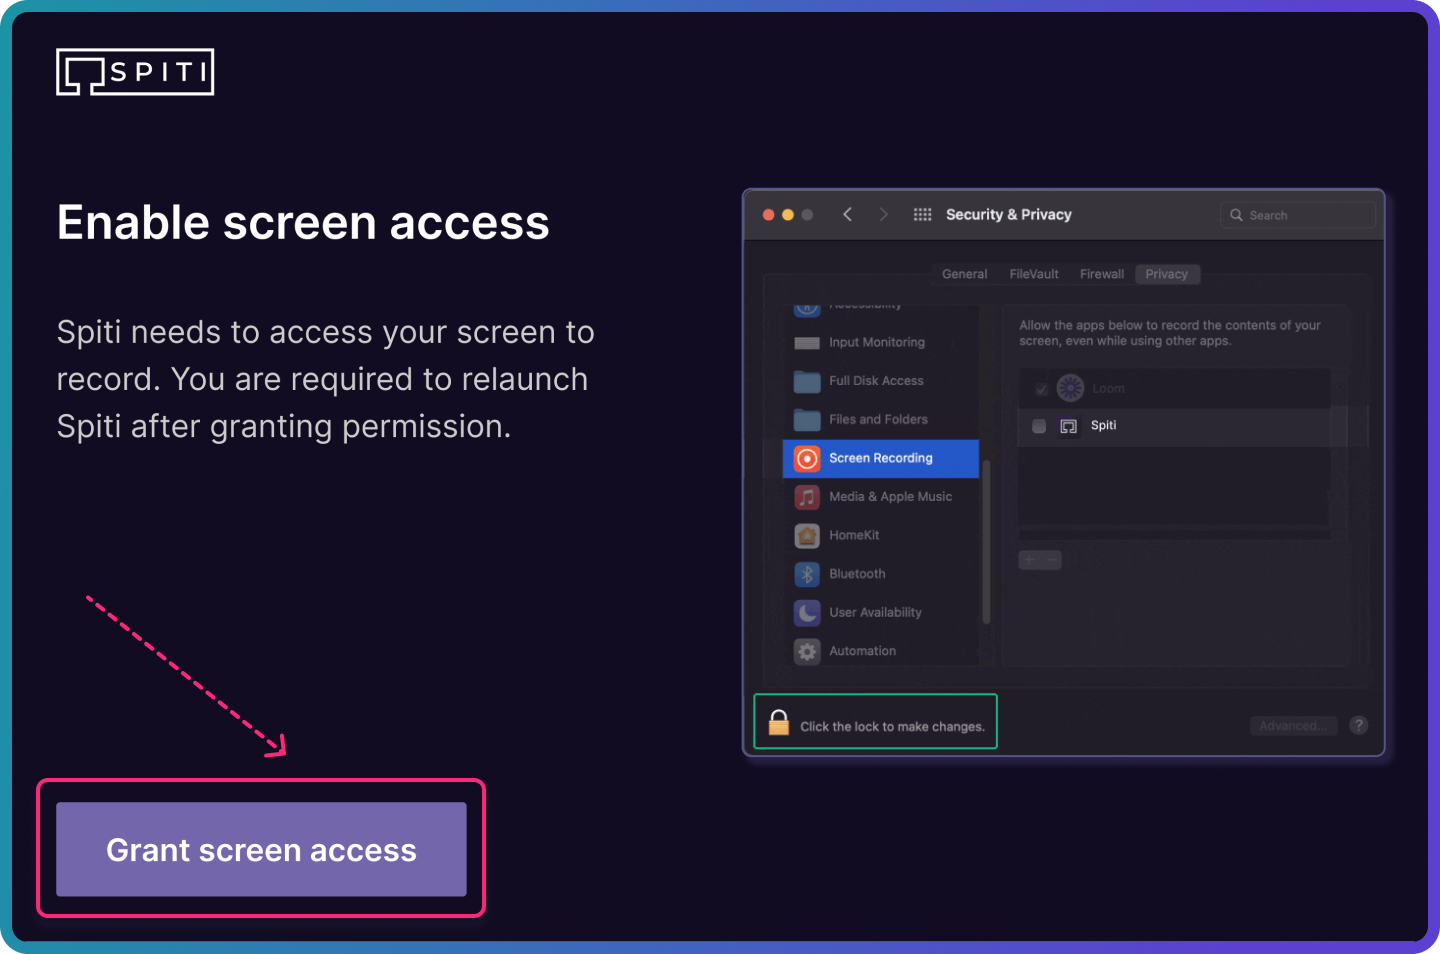
You will be prompted to grant a few permissions that are necessary for a screen + camera recorder to work.
-
Camera

-
Mic
-
Access to screen recording
-
-
You will be prompted to restart the Spiti Screen Recorder app.
-
You will see the vertical recorder open, and the menu bar on top will have the tray icon. You can click on this icon anytime to open and close the recorder.
Recording a video on Spiti Screen Recorder
-
Look for the Spiti tile icon on the menu bar and click to open. Or, you can search for Spiti in your applications
-
Select recording format
The recorder supports two kinds of recording:- Screen + camera
With this selection, your camera is active, and you will see the camera view against the screen. You can move the circular frame to place is at a convenient place on the screen. - Screen only
With this selection, your camera is off, and only your screen is recorded.
- Screen + camera
-
Select an audio input
- If you have more than one source of audio connected, eg.: a headphone, an external mic, a camera mic, etc., select the one with the best quality audio.
-
Select video source
- If you have more than one source of video connected, eg.: an external camera, or a phone, choose the one you want your face captured with.
-
Select a screen
- If you have more than one screen connected, eg.: an external camera, or a phone, choose the one you want your face captured with.
Click on Start recording. The recording will start after the 5 seconds count down.
Recording controls
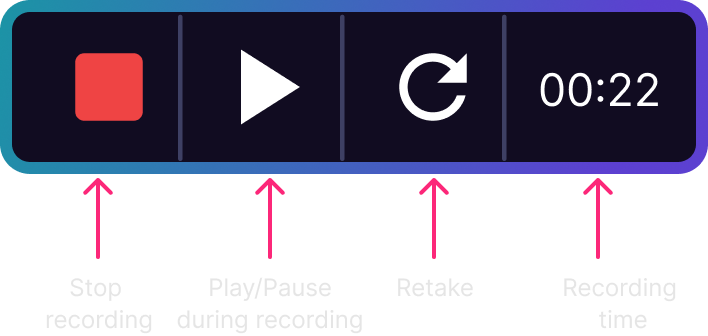
The recording controls are visible as soon as you open the Spiti Screen Recorder. It is always accessible at the bottom of the screen and helps you stop, pause, resume, or retake a recording.
Sharing and collaborating on the recorded video
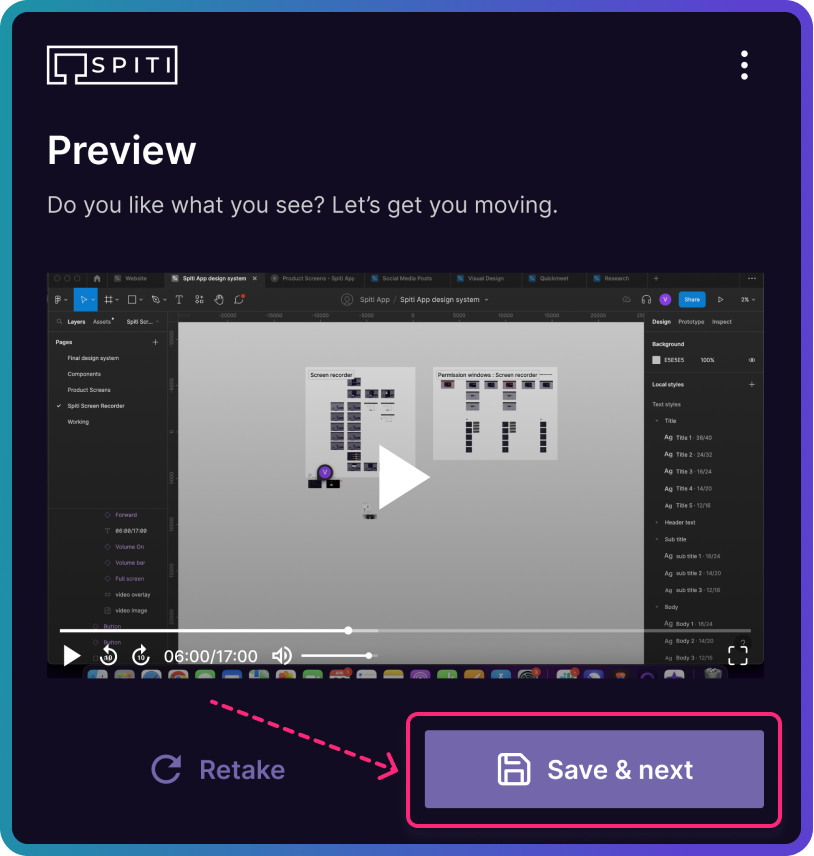
After you’re done recording a video, click on Stop, and a new modal previewing the recorded video opens. Here, if you choose to, you can watch the video and retake it if needed.
Click on ‘Save & Next’
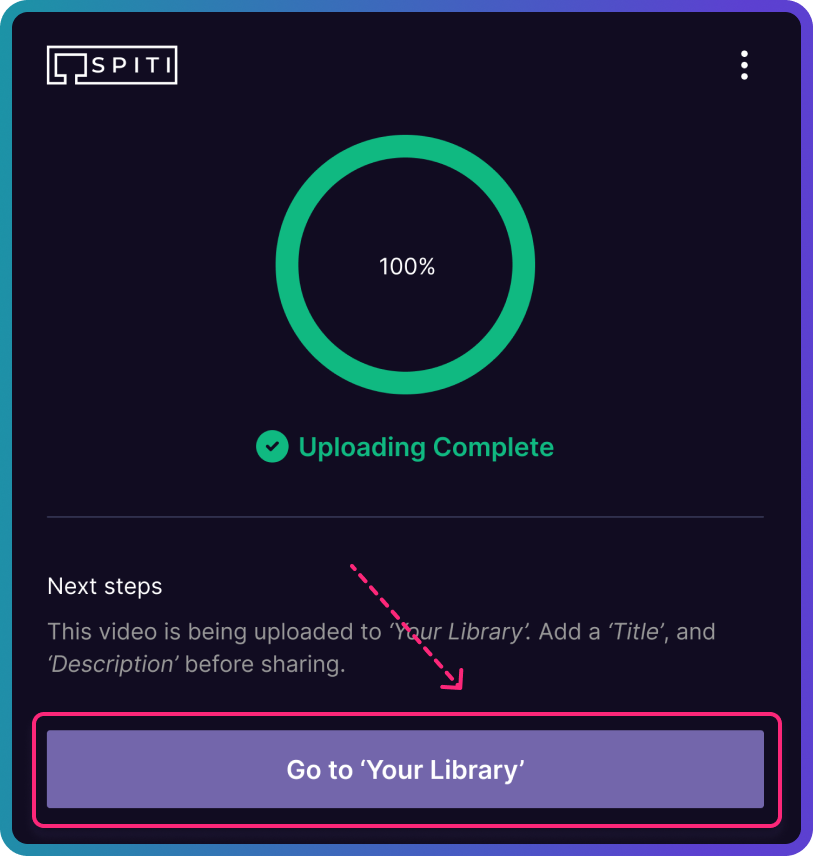
The video will begin to process and upload to your Library automatically, and it's shown on the next screen (as shown below). You can close this or click on Go to Your Library to add a Title and Description before sharing.
Once the video is in Your Library, it becomes part of It just like any other video uploaded to Spiti. Use Spiti's sharing options to share videos with team members or external collaborators.
Troubleshooting:
If you encounter any issues while using the Spiti Screen Recorder, please refer to the following troubleshooting steps:
- Make sure that you have the latest version of the screen recorder installed. Check for any available updates and install them if necessary.
- Verify that your system meets the minimum requirements for the screen recorder. Insufficient system resources can cause performance issues.
- Ensure that your camera and audio sources are properly connected and recognized by your device.
- If you encounter any error messages or unexpected behavior, please note down the details and contact our support team for further assistance.
We would love to hear from you if you have any feedback or suggestions. Happy recording!